
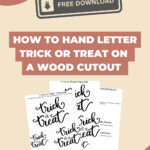
Ready to put your hand lettering on a flat, wood object? In the video below I’ll show you my process to paint “trick or treat” on a wood candy corn cutout.
Using modern calligraphy and hand lettering techniques, you’ll plan, prep, and paint trick or treat, creating a fun decoration for fall.
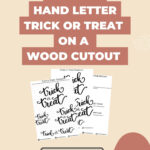
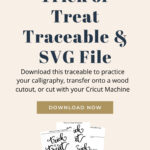
Whether or not you know how to write in modern calligraphy, you can use a free calligraphy download to make your own fall decoration. Links provided to Cricut Design Space and a svg file too.
Supplies Used:
- Wood Cutout
- White, Black, Orange and Yellow Deco Art America Paint
- Black and White Posca Pens
- Black Arteza Paint Pen
- Pencil
- Piece of Paper
Introduction to Hand Lettering
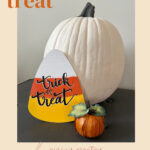
I took out my fall decorations and I had not one, but two wood candy corn cutouts. One I decorated with glass beads. The second one was blank. I thought, let’s do some hand lettering or calligraphy on it. So I put a poll out on Instagram and you came back with “trick or treat.”
So today we’re going to walk through the steps of lettering on a wood-painted object. You might have something else that you’re working on. I’m going to use what I have to create something new for Halloween that matches something that I created last year. And if you want use a cutting machine instead, you’ll find a SVG link and link to design space in the PDF.
Step 1: Make a Template
First step for anything that I letter on is to make a template. This is easy for the candy corn because it fits on a nine by 12 piece of paper. If this was a larger object, a door hanger, I’ll take butcher paper and draw a circle around that. So for this, I simply traced it.
Make a pencil template of the size of the object.
Make note of any transitions in colors on your wood object.
Then, play around with different layouts for trick or treat. You’ve got this!
Step 2: Draw your lettering or calligraphy
The PDF will help you trace the layout. You can grab the pdf here. This step, creating the calligraphy piece is to have something to trace onto your wood cutout. If you’re using the PDF, simply choose the size you want to use.
Because I know you’ll ask, I used I’m going to used a large brush pen and Canson marker paper. Part of what I like about this marker paper is it’s a translucent paper, so you can see when I put this black piece of paper under here, you can still see a little bit through it.
Step 3: Transfer Hand Lettering to Wood Object
If you have transfer paper, that would be the easiest way to do this. But I’m going to show you a trick that all you really need is a pencil. Watch the video to learn how (Minute 2:38). Basically, you’ll fill the back of the page with lead. You’re essentially making carbon transfer paper.
Make sure that this is on thick.
You want to be able to press on your design and get an imprint on the object.
Place it on your wood cutout and trace your hand lettering. Use tape to hold the design in place. If you need to peek to make sure your lettering has transferred the tape will hold the design in place.
Once we have this all traced, we’ll have an outline of our hand lettering on our object that we’ll be able to paint. You don’t want anybody else to be able to see the design. You simply need to see it so you can paint it. So we have our pencil lines marked in and the next step will be painting in our hand lettering piece.
Step 4: Adding a Base Layer of Paint to Your Calligraphy
If you’re using a variety of paint colors, I alway like to put down a base coat of paint to have a nice clean surface to paint my hand lettering piece. It’s up to you. Take this step or leave it. I find it helpful to create uniform letters.
If you’re using a cricut machine, move on and transfer your design.
Step 5: Paint Your Hand Lettering & Calligraphy
I used acrylic paint and a small size zero paint brush to paint the hand lettering piece.
It is what I have done calligraphy with using watercolors. So it’s what I’m comfortable with. Was there a possibility I’d ruin the brush, yes. But, I didn’t.
I left some of the white edges around my lettering piece where I knew I was going to go back and add shadows. Be sure to let it dry between coats.
It required two layers of black paint and some touch up with a paint pen.
Step 6: Final Steps Touch Up Calligraphy with Black Paint & Add Shadow
Okay, so for the final steps, I used a variety of tools. I first filled in with the Americana Deco Art lamp black paint and then I touched it up with an Arteza marker pen and gave it some highlights with the Posca Pen .7 in white.
I hope this helps you to hand letter or do calligraphy on a wood piece or something that you would like to display either for Halloween, for Thanksgiving, or maybe even the Christmas season.
Be sure to download the traceable and use it on whatever you’d like. Have some fun this season.
I hope you have a great week of being curious and getting creative.