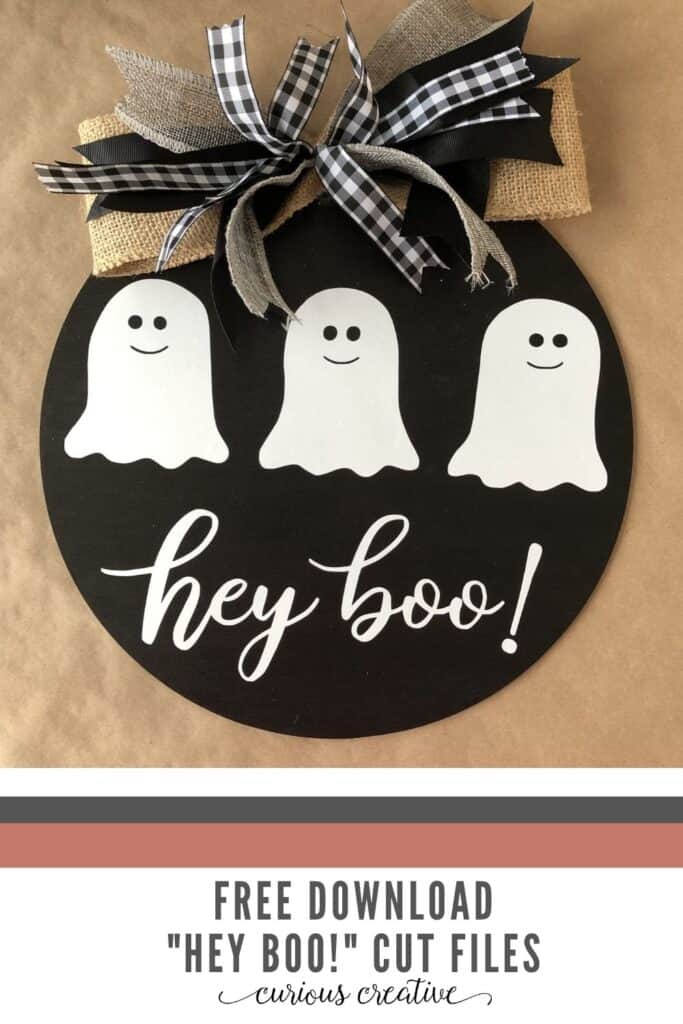
Hey Boo!
Need a last-minute Halloween decoration?
Here’s everything I used to make this cute wood sign. I hand-lettered the Hey Boo! and ghosts on my iPad pro in the Procreate app before creating these files for you. That’s another tutorial for another day!
Download the free SVG and PDF here.
Alternatives for the Cricut Maker are listed below.
Supply List
For the wood circle base:
For the ghosts and lettering:
- Cricut Maker
- Light grip mat
- Weeding & burnishing tool
- White permanent vinyl
- Black permanent matte vinyl
- Standard Grip Transfer tape
For the bow:
4 types of ribbon in a variety of widths (wired ribbon preferred)
- Burlap Ribbon – 3 inches wide
- Gray
- Black
- Black and white check
- Wire or twine 6-8 inches
- Stapler
- Hot glue gun
- 3M Command strip for hanging.
If you do not have a Cricut, you could easily paint the ghosts and hand letter the words “hey boo!” with a paint pen. Here are a few of my favorites
Step By Step Instructions
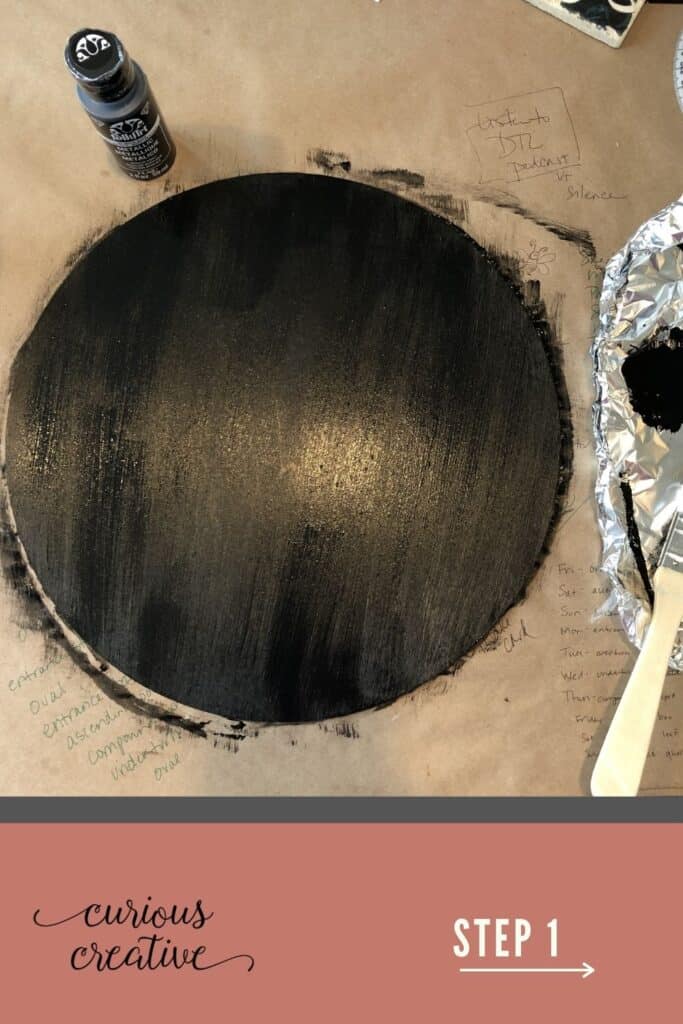
Step 1.
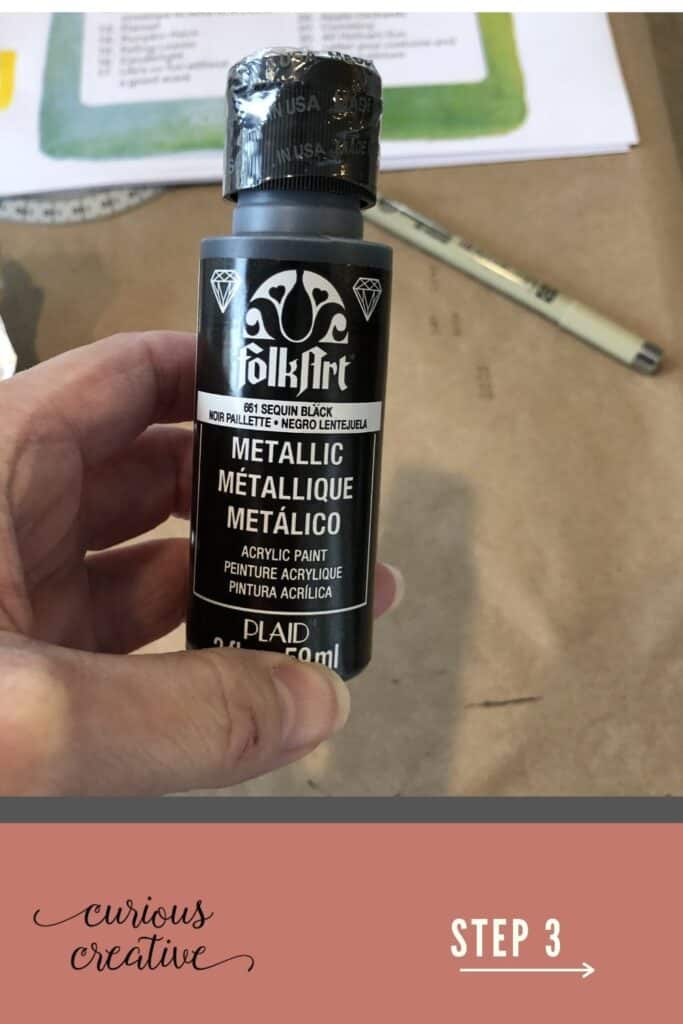
Paint the wood circle with black paint. Mine took two coats. Plan accordingly.
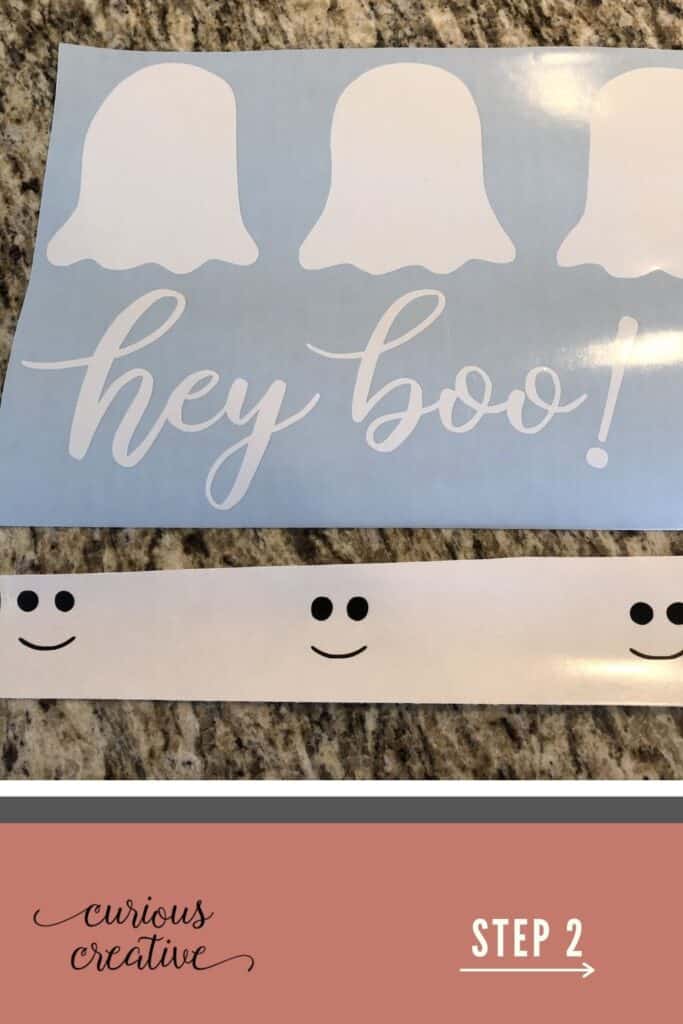
Step 2.
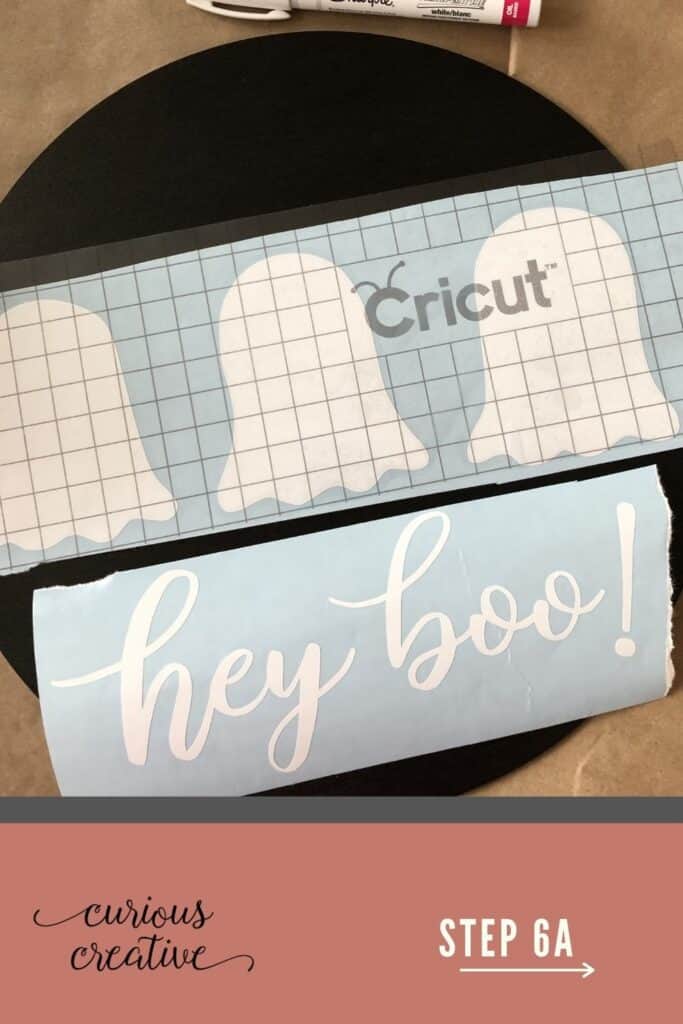
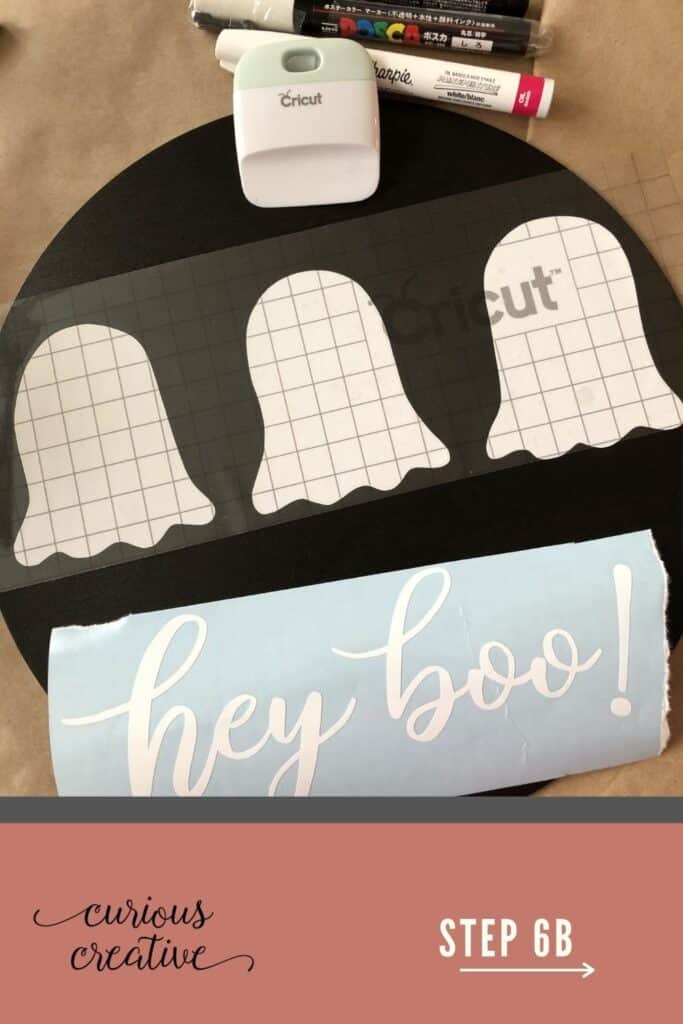
Cut the “Hey boo!” design on your Cricut maker. Weed lettering, ghosts, and faces. Set aside.
Step 3.
Check if you need to paint another coat on your wood circle. If yes, do so now.
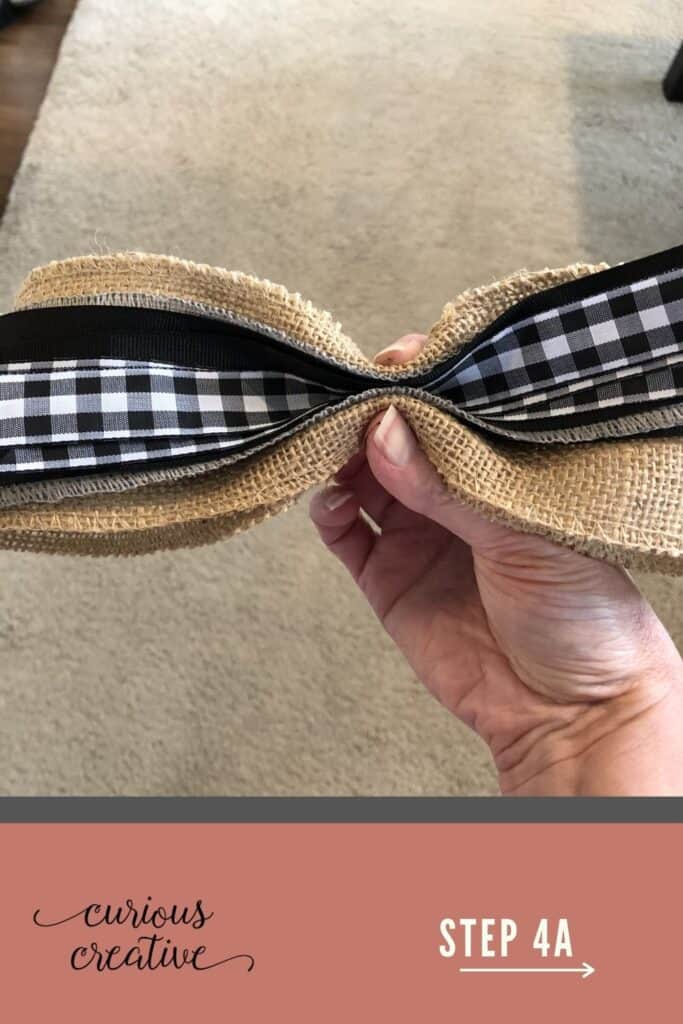
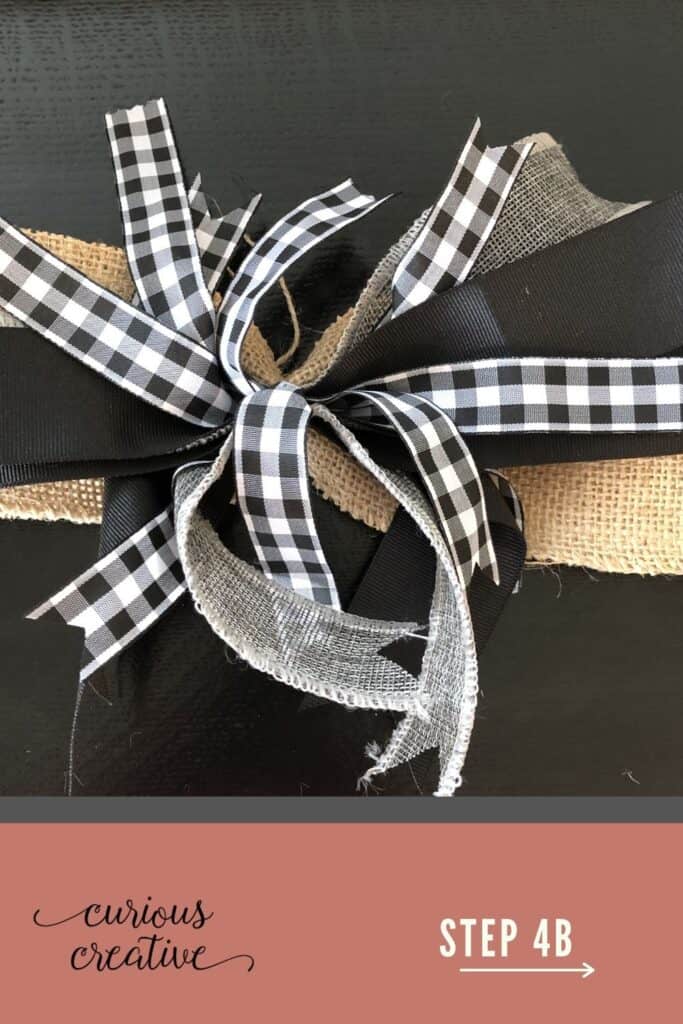
Step 4.
Make bow.
Can I admit I am horrible at making bows?
Here’s my simple step by step process:
- Cut 1 piece of largest ribbon 22 inches long.
- Bring ends together into a circle and staple the two layers together in the middle to give two loops on each side.
- Cut 7-10 pieces of 2-3 types of ribbon 10 inches long. Use pinking sheers to finish the ends or cut as shown in the picture for an added touch.
- Squeeze bow together
- Tie with twine, wire, or any non-slippery fabric.
Step 5
Check if the paint is dry, including on edges. If you’re giving this as a gift, be sure to paint the reverse side, too. I didn’t paint mine for two reasons. First, it was staying inside my house. Second, no one else was going to see the back.
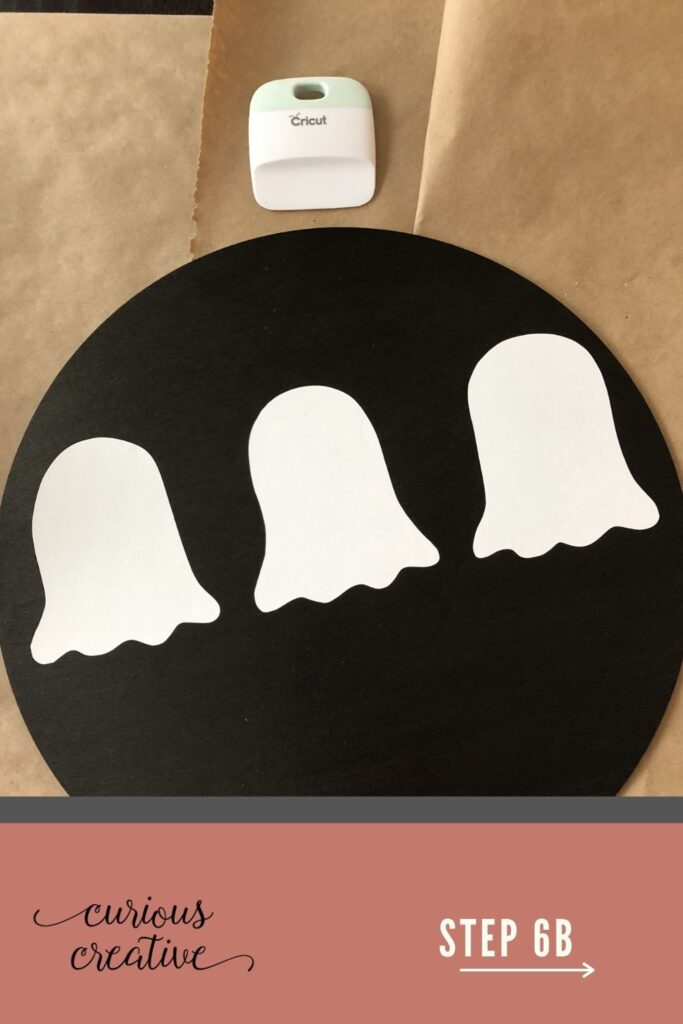
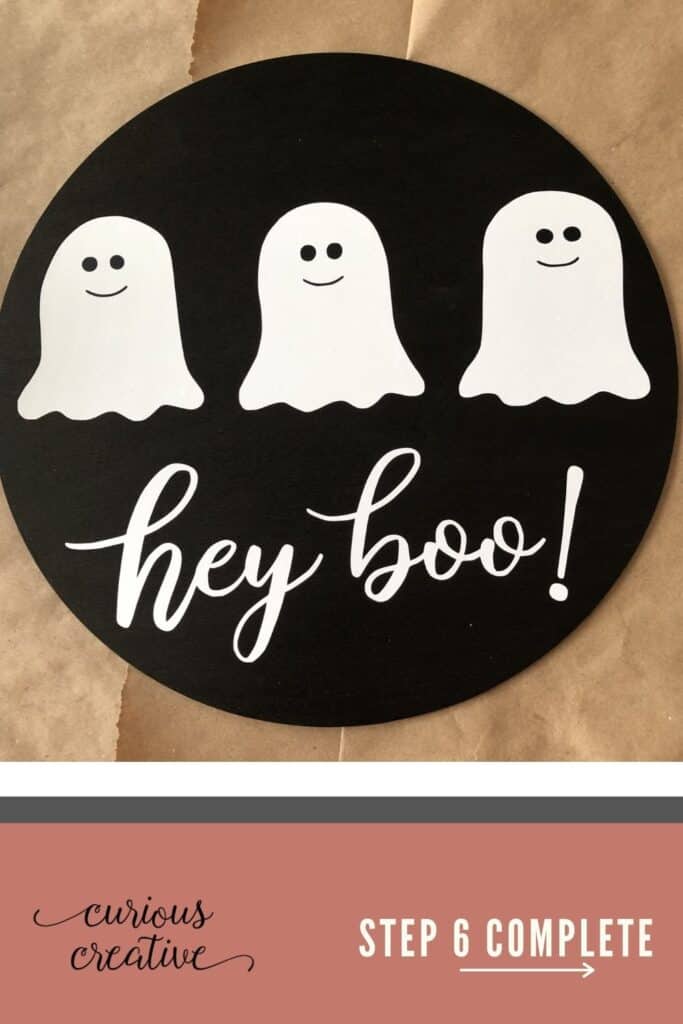
Step 6.
Once the paint is dry on your wood circle, it’s time to transfer your Cricut cutouts.
- Remember, at each step in the transfer process to use your burnishing tool to make sure vinyl is securely attached to the transfer tape and then to wood.
- Transfer ghost shapes to design. Use the lines on the transfer paper to place the ghosts where you’d like them. I lined mine up. You could make your ghosts dance. You do you.
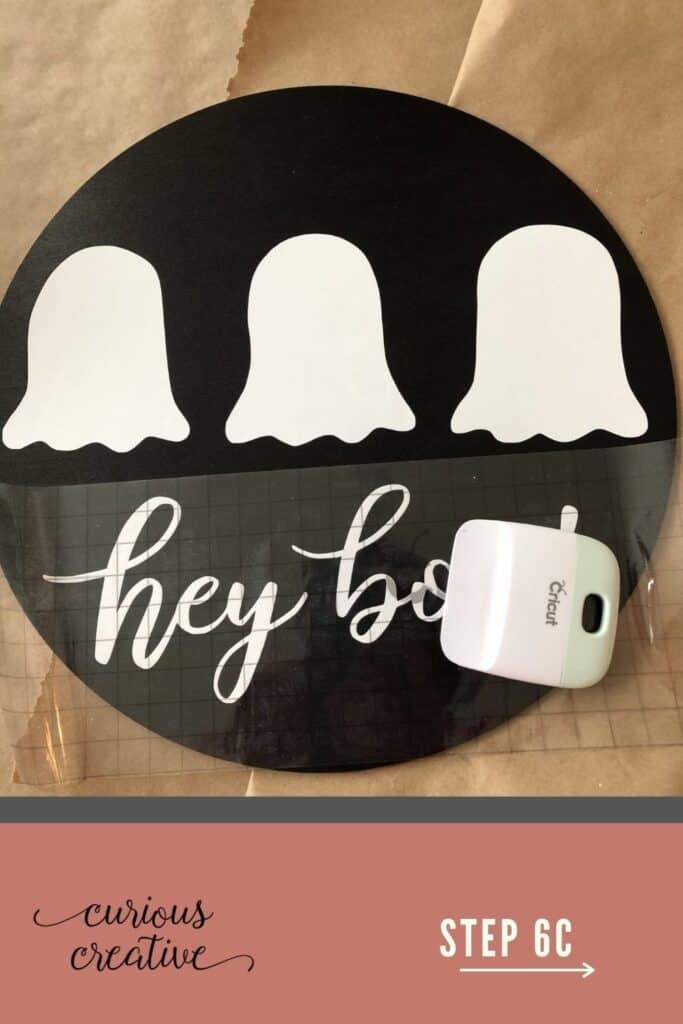
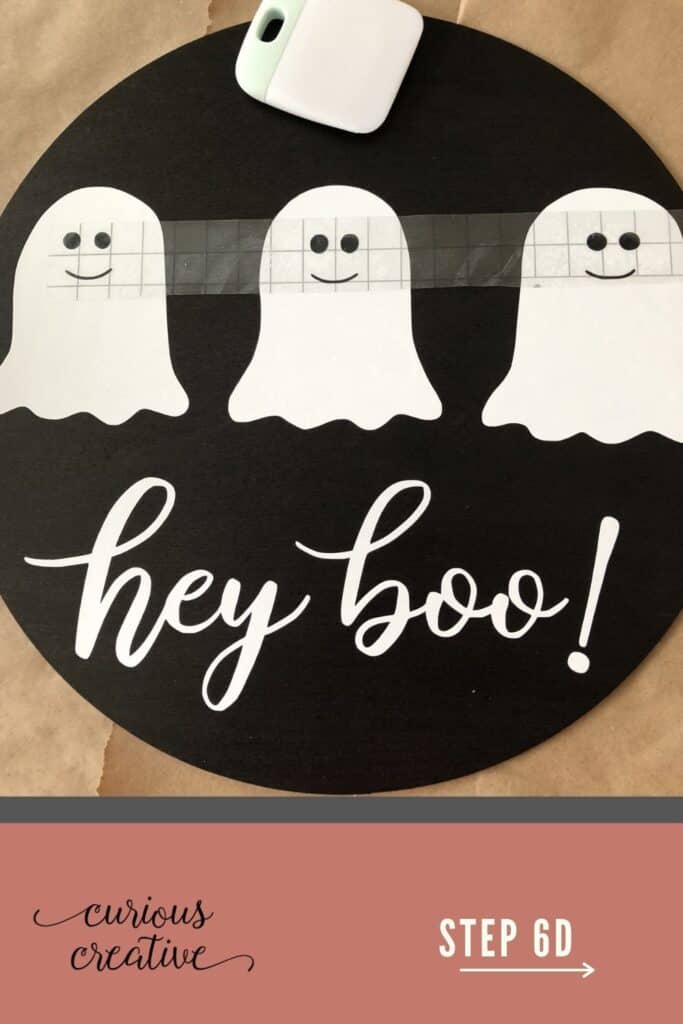
- Use the burnishing tool to make sure the ghosts are securely attached to the wood. Repeat this process for the letters. Reuse the transfer tape to decrease the stickiness by the time you get to the eyes. Make sure you burnish the design before slowly peeling back the transfer tape.
- Transfer “hey boo!” cutout and eyes for the ghost. Hint: cut your transfer tape to the height of the eyes and mouth so you don’t risk pulling up portions of the ghost. You may have a different process for layering vinyl. Do what you find works. I find it’s always a bit tricky.
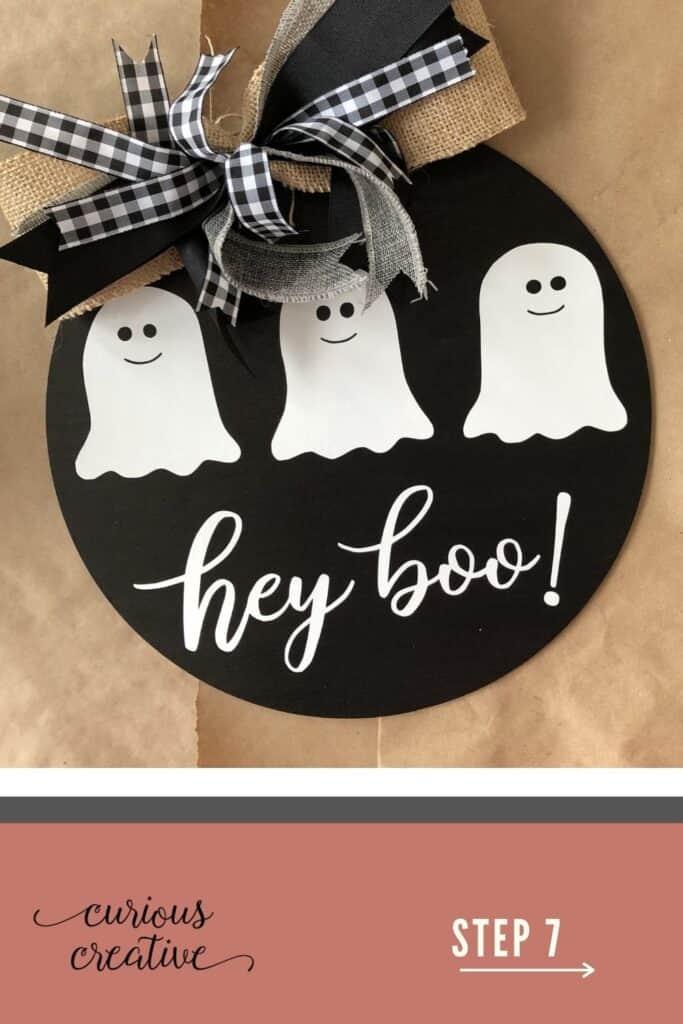
Step 7
Attach the bow with hot glue.
If you’re going to hang it outside, attach a piece of twine or ribbon to make a hanging loop.
Display and enjoy!
Hey boo, tag me on instagram at @st.creates if you make this, ok?
No Cricut Maker? Try this!
- Print out the design
- Use graphite paper to transfer the design onto your page
- Place graphite paper down on top of the painted wood circle (shiny side down)
- Place the printout of the design over the graphite paper.
- Trace the design. The graphite paper will transfer a light line onto your page.
- Test first! Your black paint may make it hard to see.
No Graphite Paper?
Try this Option with a Number 2 Pencil
- Turn the printed design page over, use the side of a number 2 pencil, and scribble across the design.
- Turn the design right side up.
- Place on your wood circle.
- Trace the design.
- The graphite you scribbled on the back of the page will transfer to your painted circle. You’re working with black paint, so you may need to look at an angle to get it down.
Can’t see the graphite?
Try Option 3: Chalk…ergh I mean ghost dust.
- You might try tracing chalk on the back of the design.
- Turn it over and trace the design with a felt tip pen onto the painted wood.
- It’s likely chalk will end up permanently on your design.
- …and that’s why I called this option Ghost dust?